CCI Week #16 - A Thanksgiving Place Card
Our theme this week over at Creative Critterz was to do a Thanksgiving table decoration. I'm not a huge fan of Thanksgiving, mostly because I used to get in trouble a lot as a kid on this holiday because someone decided I needed to sit still for more than five minutes (Thanks Mom!). Silly, right?
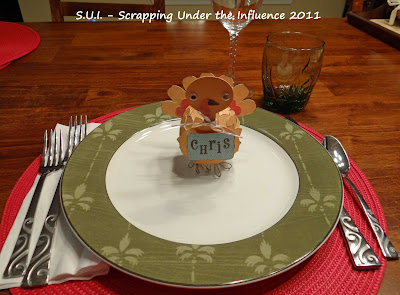
For my project (after two failed projects that are staring shamefully at me in my craft room) I decided to make a place card.
He came out kinda cute, huh?
The base for the turkey is a small styrofoam ball. I cut leaves from Accent Essentials at 3/4" and filled them with a pattern from Imagine More. I cut about three dozen of them. I randomly inked parts of the the leaves. I used Fabri-tac to adhere them to the ball.
With my craft knife I pared down the front and back of the ball to make the head and tail pieces fit a little better. For those parts I used the turkey from Create A Critter. I cut the layers at about 3.5" and filled them with patterns and colors from Imagine More. For the back piece I trimmed the feet off the back layer.
I tied a little twine bow around his neck and added the name tag using Accent Essentials. I stamped the name on the tag and adhered it with a pop dot.
His feet are made from 24 gauge floral wire that I bent and then colored with a brown Copic to soften them up so they weren't all shiny.
Supplies:
White cardstock
Tim Holtz Distress Ink
Styrofoam ball (3")
24 Gauge floral wire


Comments
I like the idea of adding the floral wire for his feet;0)
Happy Thanksgiving:0)